转载请注明出处❤️
作者:测试蔡坨坨
原文链接:caituotuo.top/d59b986c.html
你好,我是测试蔡坨坨。
众所周知,Selenium在2021年10月13号发布了Selenium4,目前最新的版本应该是Selenium 4.4.0。
以前一直用的Selenium3,那么Selenium4相对Selenium3对我们做自动化测试来说有哪些需要注意的改进点或者变化呢?
今天,我们就来简单地聊一聊Selenium4的那些新变化。
通过阅读官方文档 ,总结了几个比较引人注目的变化点。
元素定位 在Selenium4中,不推荐把定位方式直接写在方法名中,比如一系列的find_element_by_xx方法find_element_by_id、find_element_by_name、find_element_by_class_name等都被整合成为了一个方法find_element,并且通过By.method来选择你的查找元素方法。
同理,多个元素定位推荐使用find_elements(By.method,””)。
注意:
虽然find_element_by_id、find_element_by_name……这些方法目前仍然可以使用,但是运行时会有DeprecationWarning警告
find_element(By.method, “xxx”)这种方法在3版本也有,但是并没有特别强调
这种方法的使用需要引入类By,from selenium.webdriver.common.by import By
1 2 3 4 5 6 7 8 9 10 11 12 13 14 15 16 17 18 19 20 21 22 23 24 import timefrom selenium import webdriverfrom selenium.webdriver.common.by import Bydriver = webdriver.Chrome() driver.get("https://www.baidu.com" ) driver.find_element(By.ID, "kw" ).send_keys("测试蔡坨坨" ) driver.find_element(By.ID, "su" ).click() time.sleep(3 ) driver.quit()
不推荐:
1 2 3 4 5 6 7 8 driver.find_element_by_class_name("className" ) driver.find_element_by_css_selector(".className" ) driver.find_element_by_id("elementId" ) driver.find_element_by_link_text("linkText" ) driver.find_element_by_name("elementName" ) driver.find_element_by_partial_link_text("partialText" ) driver.find_element_by_tag_name("elementTagName" ) driver.find_element_by_xpath("xpath" )
推荐:
1
2
3
4
5
6
7
8
9
10
from selenium.webdriver.common.by import Bydriver.find_element(By.CLASS_NAME,"xx" ) driver.find_element(By.CSS_SELECTOR,"xx" ) driver.find_element(By.ID,"xx" ) driver.find_element(By.LINK_TEXT,"xx" ) driver.find_element(By.NAME,"xx" ) driver.find_element(By.PARITIAL_LINK_TEXT,"xx" ) driver.find_element(By.TAG_NAME,"xx" ) driver.find_element(By.XPATH,"xx" )
相对位置定位 在Selenium4中带来了相对定位这个新功能,在以前的版本中被称之为“好友定位(Friendly Locators)”,它可以通过将某些元素作为参考来定位其附近的元素。
find_element方法支持with(By)新方法,可返回RelativeLocator相对定位对象。
举栗1:登录功能,密码输入框在用户名输入框的下方
1
2
3
4
from selenium.webdriver.support.relative_locator import locate_withusername = driver.find_element(By.ID, "username" ) password = driver.find_element(locate_with(By.ID, "password" ).below(username))
举栗2:要获取下图所示所有文章标题左侧的图片地址
操作步骤:
获取文章标题的位置作为锚点
通过with_tag_name查找元素的标签,要找的是图片标签就是with_tag_name(‘img’)
在文章标题的左侧就是to_left_of(其他位置关系如:to_right_of、below、above、near、to_dict)
代码实现:
1 2 3 4 5 6 7 8 9 10 11 12 13 14 15 16 17 18 19 20 21 22 23 24 25 import timefrom selenium import webdriverfrom selenium.webdriver.common.by import Byfrom selenium.webdriver.support.relative_locator import with_tag_namedriver = webdriver.Chrome() driver.get("https://caituotuo.top/" ) driver.find_element(By.XPATH, '//*[@id="scroll-down"]/i' ).click() time.sleep(2 ) article_title = driver.find_element(By.CLASS_NAME, "article-title" ) elements = driver.find_elements(with_tag_name('img' ).to_left_of(article_title)) for e in elements: print(e.get_attribute('src' )) driver.quit()
运行结果:
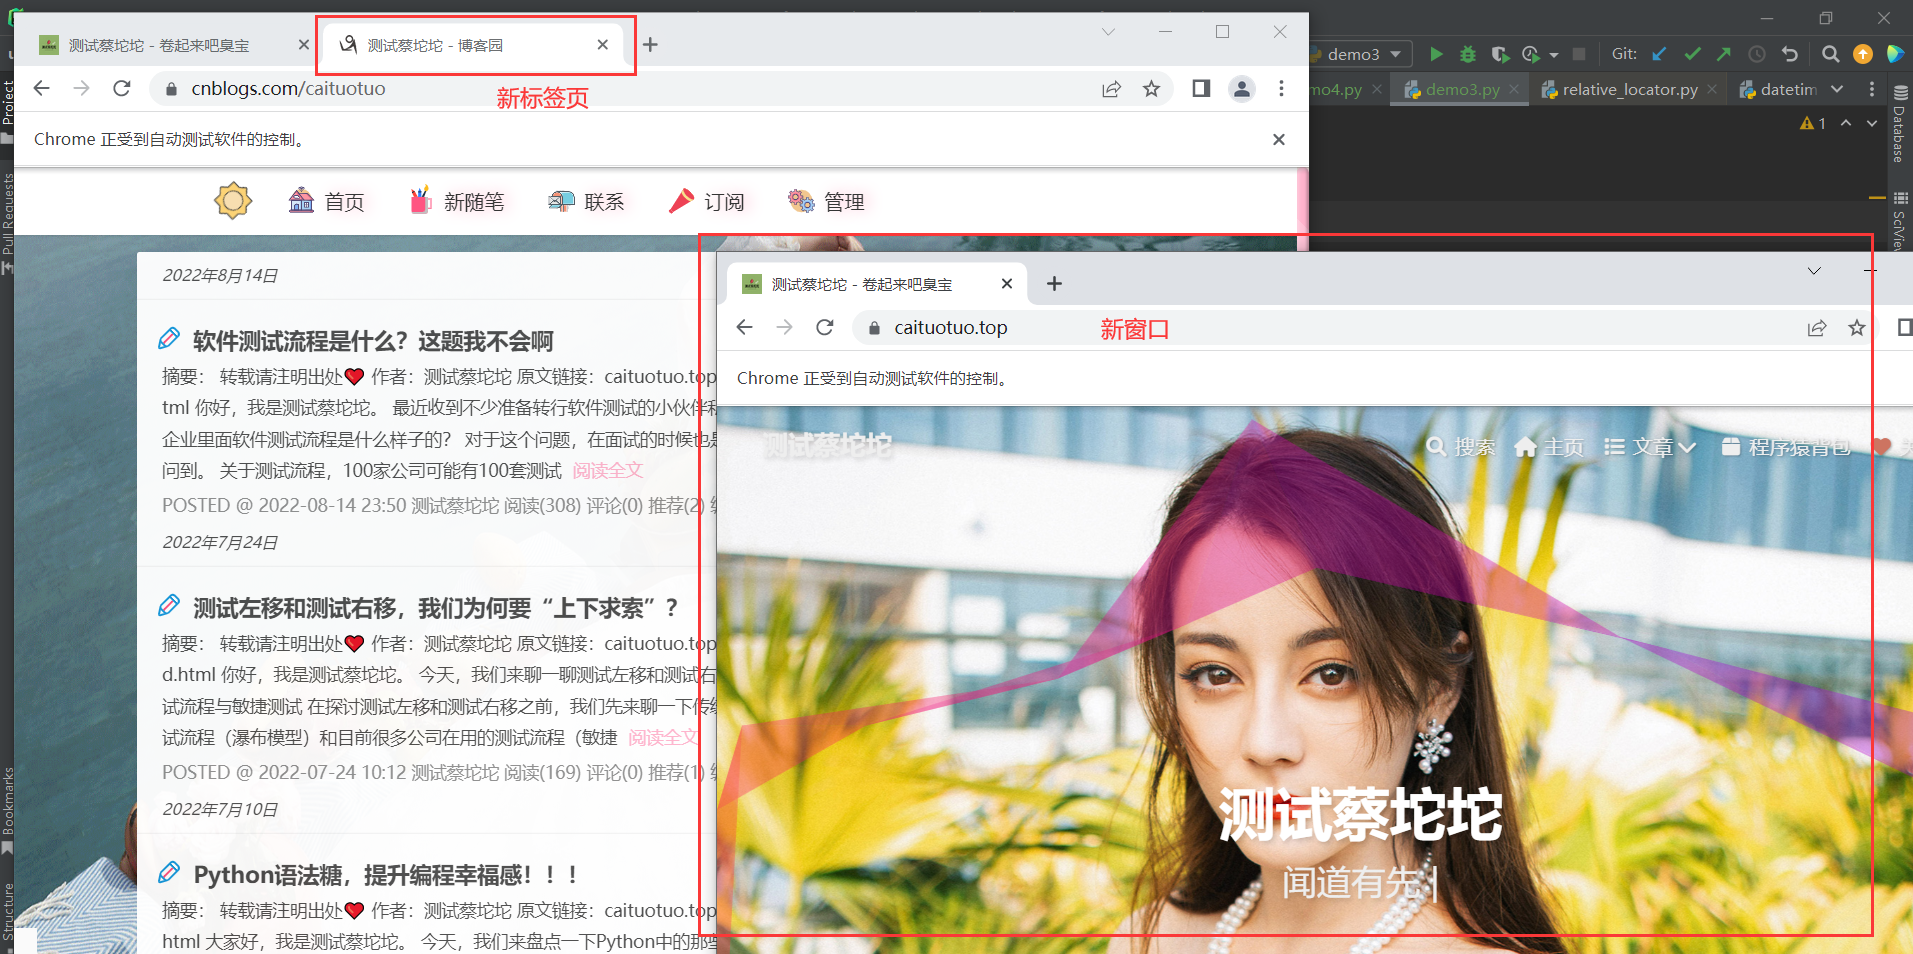
打开新的标签页或窗口 当我们需要测试打开几个页面或浏览器的场景时,在Selenium3中的操作步骤:
创建新的Web Driver实例
再使用Windowhandle方法中的Switch来执行操作
在Selenium4中有一个新的API,new_window,这意味着不需要再自己创建新的Web Driver实例
1 2 3 4 5 6 7 8 9 10 11 12 13 14 15 16 17 18 19 20 21 22 23 24 import timefrom selenium import webdriverdriver = webdriver.Chrome() driver.get("https://caituotuo.top/" ) driver.switch_to.new_window("tab" ) driver.get("https://www.cnblogs.com/caituotuo" ) print(driver.title) driver.switch_to.new_window("window" ) driver.get("https://caituotuo.top/" ) print(driver.title) time.sleep(3 ) driver.quit()
模拟移动设备 作用:将浏览器调成移动端模式,用于测试移动端H5页面。
1 2 3 4 5 6 7 8 9 10 11 12 13 14 15 16 17 18 19 20 21 22 23 24 25 import timefrom selenium import webdriverfrom selenium.webdriver.common.by import Bydriver = webdriver.Chrome() driver.execute_cdp_cmd( "Emulation.setDeviceMetricsOverride" , { "width" : 400 , "height" : 650 , "mobile" : True , "deviceScaleFactor" : 100 } ) driver.get("https://caituotuo.top/" ) driver.find_element(By.XPATH, '//*[@id="scroll-down"]/i' ).click() time.sleep(3 ) driver.quit()


